
Making Sauerkraut in a Jar -The Quart Jar Method
What is sauerkraut?
Sauerkraut is a German word that means “sour cabbage.” Although this German word appears to be the most popular name for this side dish, fermented cabbage is found in countries around the world. Perhaps it is so popular because it tastes so good. Perhaps it is because it has wonderful health benefits. In either case, let’s talk about how to make a small batch of sauerkraut.
What do I need to make a small batch of sauerkraut?
There are very few items required for sauerkraut. For a successful batch, you need:
- cabbage –fresh is best, ideally picked and processed within 48 hours of harvesting
- salt –canning or kosher salt is ideal
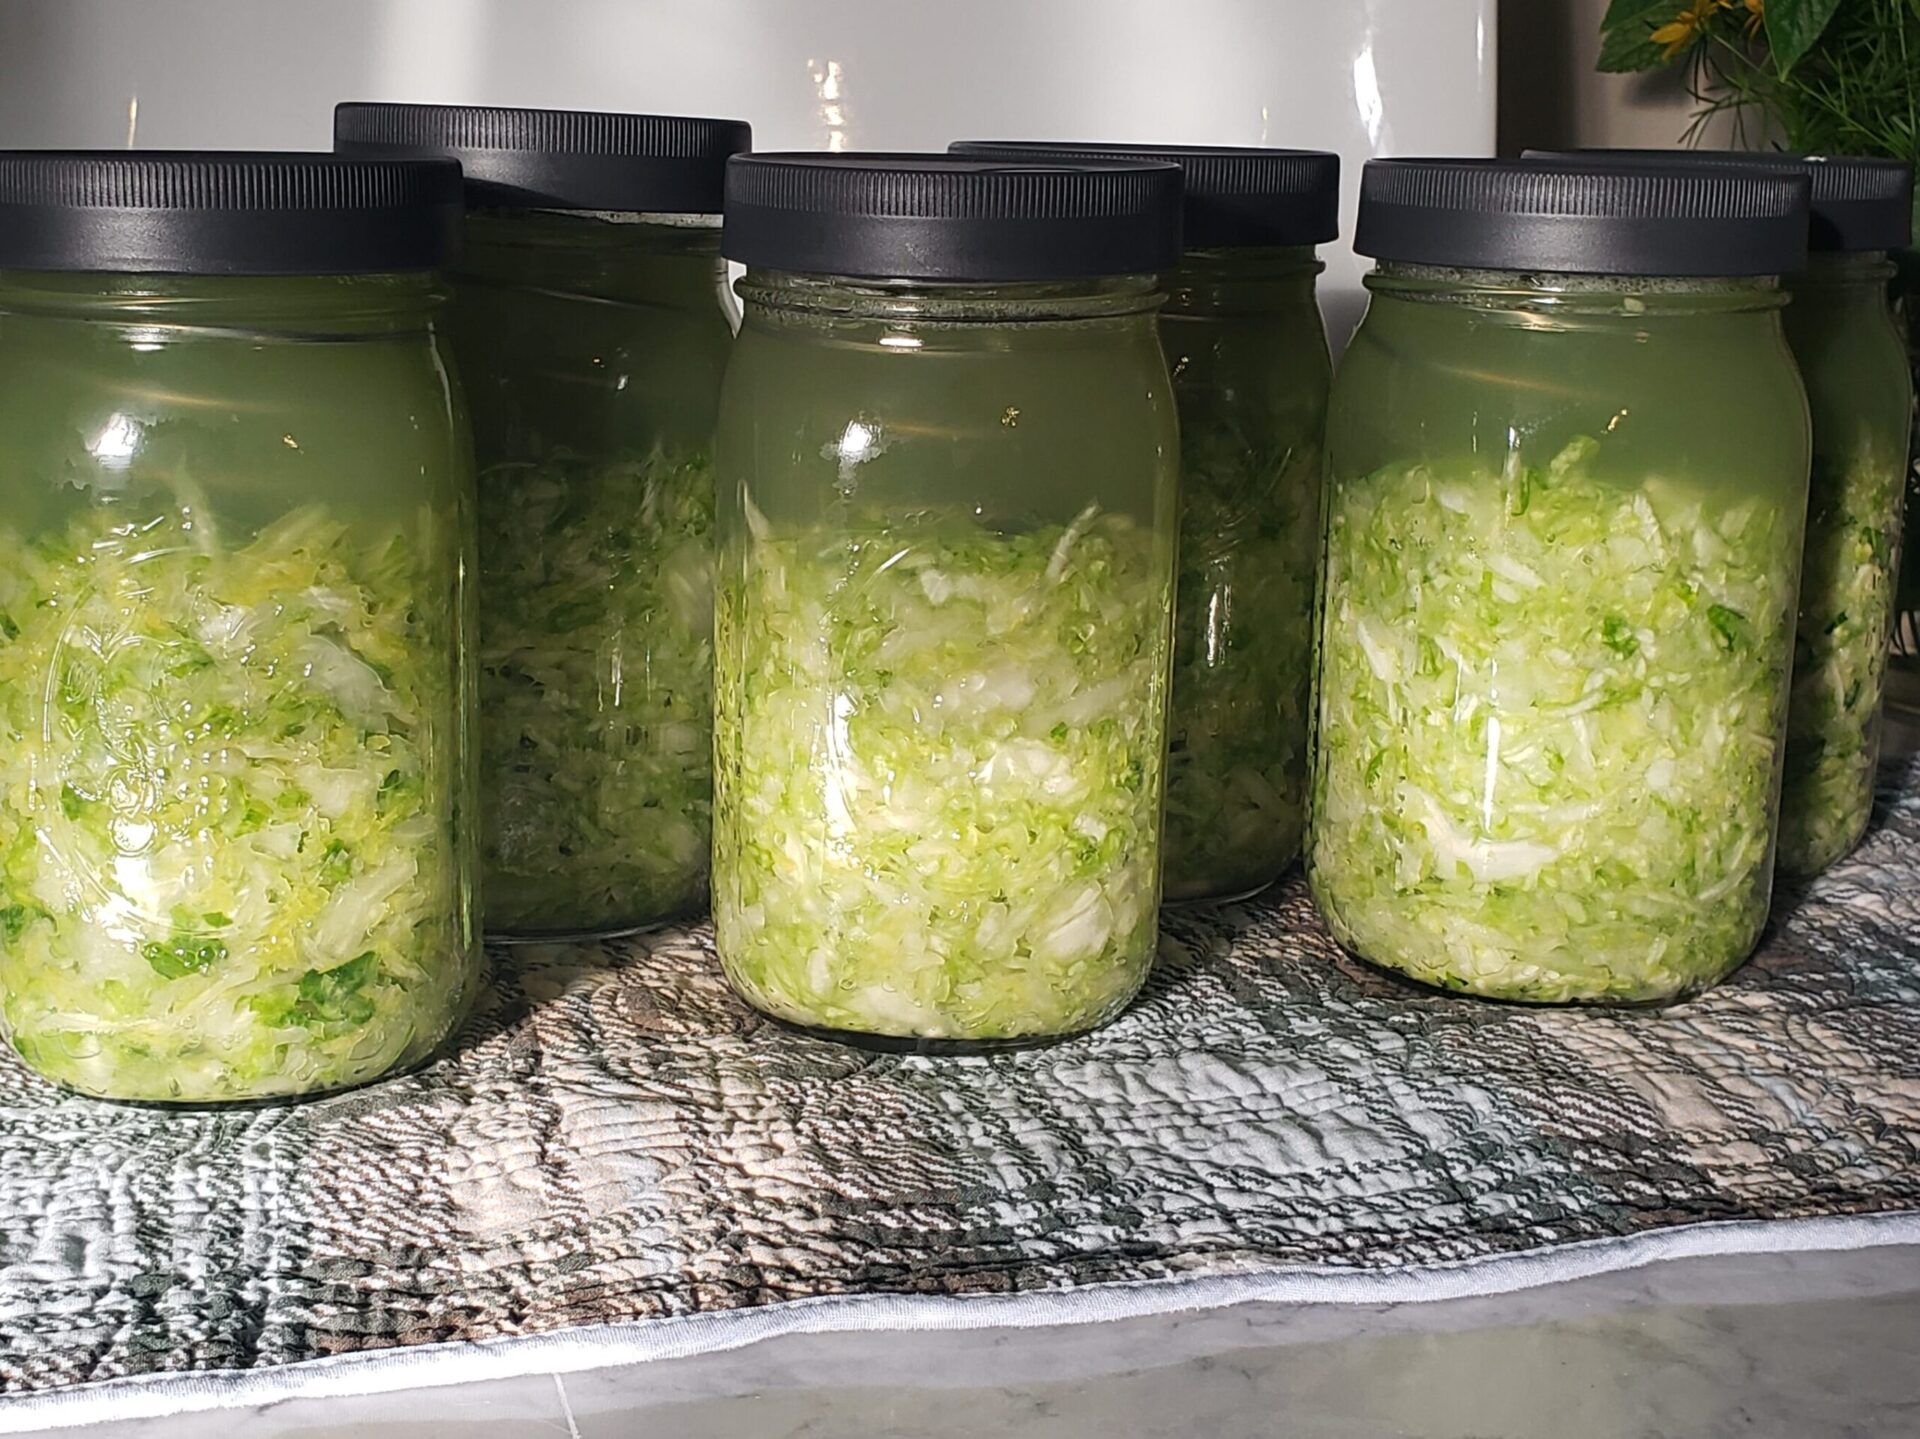
- a quart jar –you can adjust this recipe to make multiple jars or a large crock, but we’ll explain why we prefer this size
- a fermenting lid or cheesecloth –a cover for your jar
- a weight that fits inside the jar — to prevent cabbage from floating to the surface
How do I make sauerkraut?
While fermenting can seem intimidating, it really is just science…and boy do we love science! You will be using the natural bacteria living on the cabbage to lacto-ferment it; this acid is what gives sauerkraut its distinctive flavor. To make each quart, you will need:
- two pounds of shredded cabbage
- one tablespoon of salt.
You can cut cabbage by hand, run it through a food processor, or shred it with a mandolin. However, the more consistent you shred it, the better. Smaller pieces with ferment much more quickly than larger pieces, which means they can lose their texture. Once you have shredded the cabbage, weigh out two pounds in a large vessel –bowl or food-grade bucket and add one tablespoon of salt. Begin massaging the salt into the cabbage; the salt will pull the water out of the leaves. You want to continue this process for several minutes until you have created about a cup or so of brine. Add your cabbage to the quart jar, carefully packing it into the bottom. The two pounds will fit –promise! Then top off the jar with the brine.
Once your ‘kraut is made, you want to make sure it doesn’t float. Since you are using a jar, you will need a smaller weight to keep the cabbage towards the bottom of the jar. You could use a baggie filled with extra brine or even a smaller jar for this purpose. We opted to invest in a Ball brand fermenting kit that included a spring which keeps the cabbage submerged. Any of these options will work just fine –a weight is a weight. We also like to cut a small circle out of one of the outer cabbage leaves to act as an additional “seal”; we place the leaf on top of the shredded cabbage (and below the brine) to help keep the cabbage in place prior to placing our weight.
Once the cabbage is weighted down, close your jar using a fermenting lid or cheesecloth. You don’t want to use a regular canning lid because this process creates gas and the gas needs to be able to escape
What do I do once the sauerkraut is made?
You don’t have to do much. Check on your jars every day or two. If you see bubbles at the surface of your brine, it is an excellent sign that fermentation is happening. If you see any floating pieces of cabbage, they should be removed. Pieces of cabbage not submerged can mold and ruin an entire batch of sauerkraut…we definitely don’t want that! You can also carefully skim off any scum that may have formed on the surface, too.
Allow your sauerkraut to ferment at room temperature for at least three days; however we recommend fermenting for at least two weeks for the best flavor. Once completed, you can replace the cheesecloth or fermentation lid with a regular jar lid and pop them into the fridge so you can enjoy the sour goodness for weeks to come. You can also water bath can sauerkraut if fridge space is limited; however, it will kill the beneficial bacteria residing in the ferment. Check out our printable canning inventory to help you organize your jars!
Why do we prefer the quart jar method?
We prefer the quart jar method for several reasons:
- smaller batches minimize potential loss
- it allows you to process smaller batches as your cabbage is ready
- once fermentation is complete, you don’t have to transfer the sauerkraut to another container.
So, here’s the real deal. We’ve been making sauerkraut for several years. Last year our goal was to make the largest batch to date. Sadly, the large batch went bad and we lost it all. All 20 pounds of it. When using quart jars, if one happens to go south, you’re only losing one jar…not an entire batch. This was the driving factor to change our method. But, as noted, there are also other benefits. Fermenting in quart jars is ideal if you are only growing two or three cabbages earmarked for sauerkraut. It is also perfect for a staggered harvest.
No comments.