Get to know Samantha from Green Pig Farm!!

Well, guys, I finally did it!! I met with Freddy Vasquez from FXV Digital, where we donned headphones and turned on the mics to talk about homesteading. This was the first I’ve ever done a podcast, but had so much fun recording it! We talked about how Green Pig Farm started, what keeps us busy, why we do what we do, and more!

You might be wondering Fred and I connected with each other. We have daughters who played volleyball together years ago. A simple carpool arrangement turned into nearly a decade-long friendship. He mentored me when developing a brand and website for Green Pig Farm. In return, we shared our garden bounty and homemade baked goods. (Ask him about our bread!) Fred is an awesome person –super genuine and honest, and a Green Pig Farm lover. To be honest he loves and supports lots of local businesses…not just us.

Here’s Fred’s Podcast summary: Samantha Shaak is a local school teacher who decided to put a cucumber plant in the ground many years ago and the rest is history. Homesteading is now her passion and Samantha hopes to inspire others to take control of their life through their food.

You can find the recording here: FredTalk #33 | Samantha Shaak

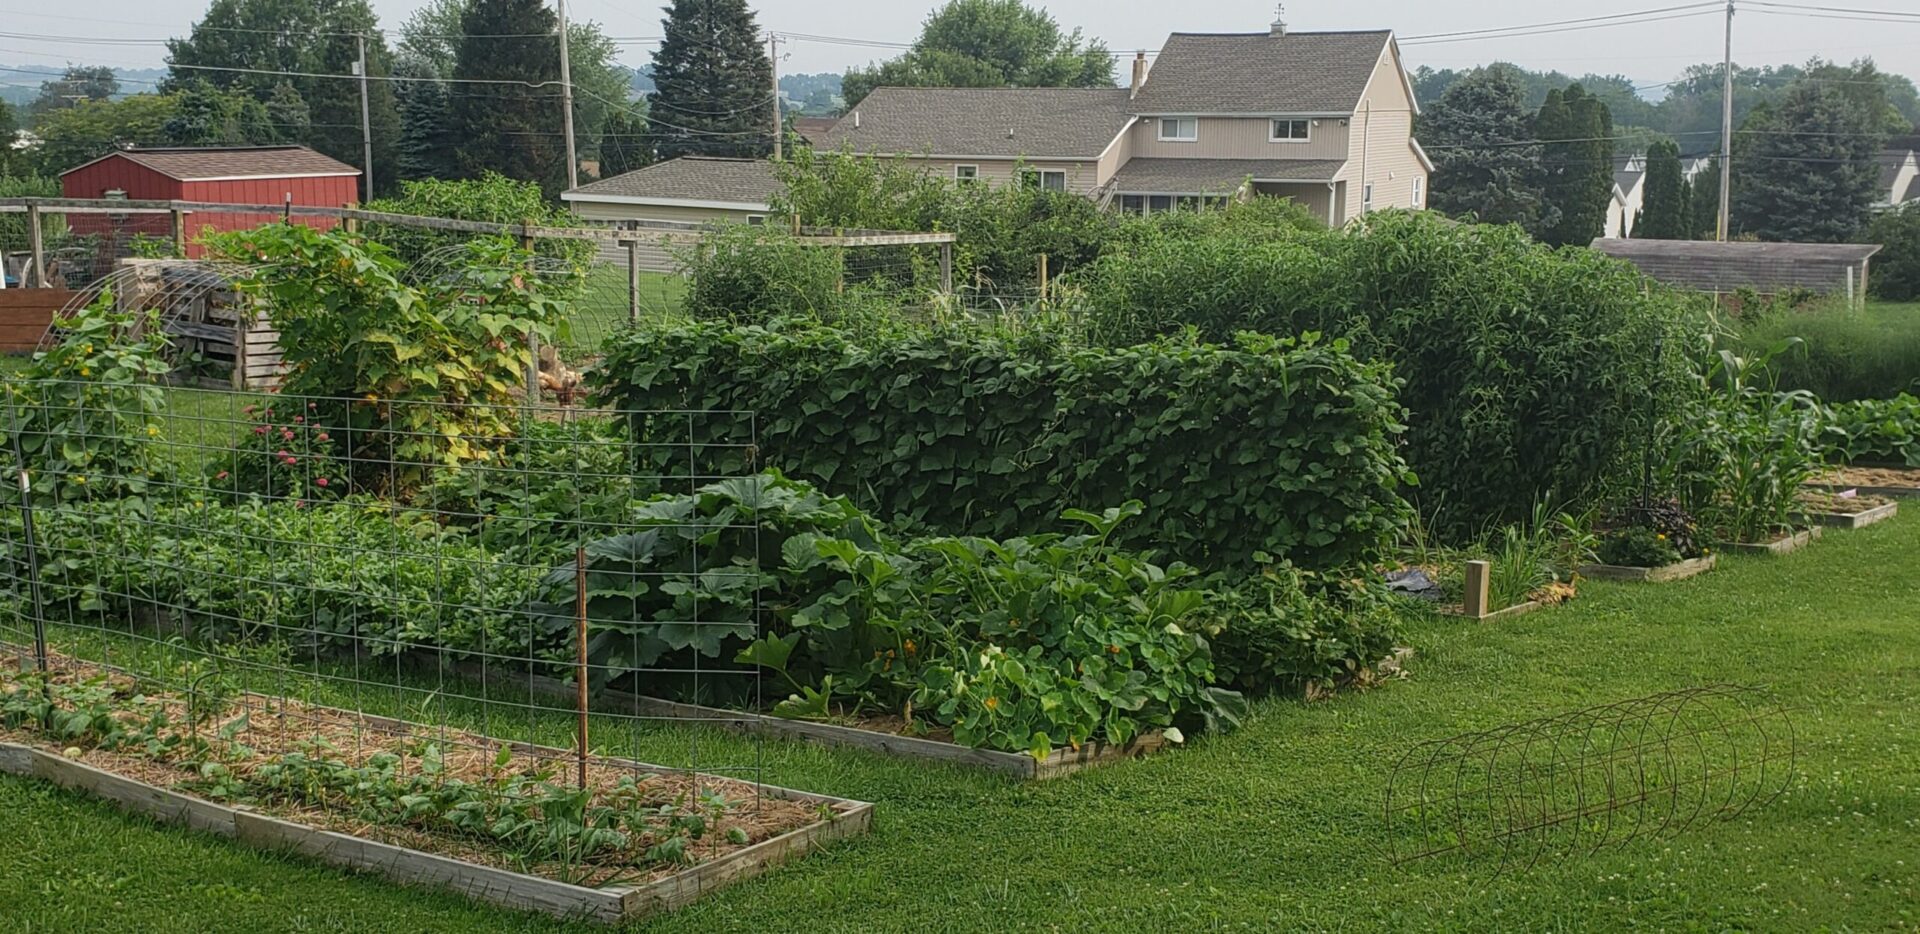
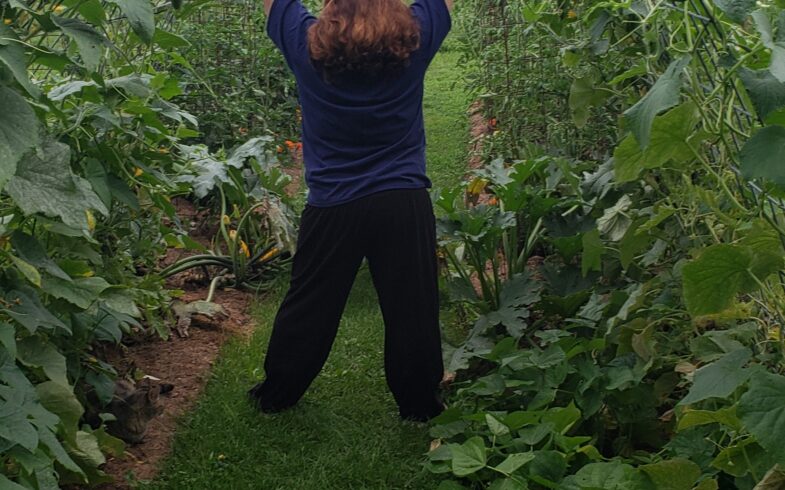
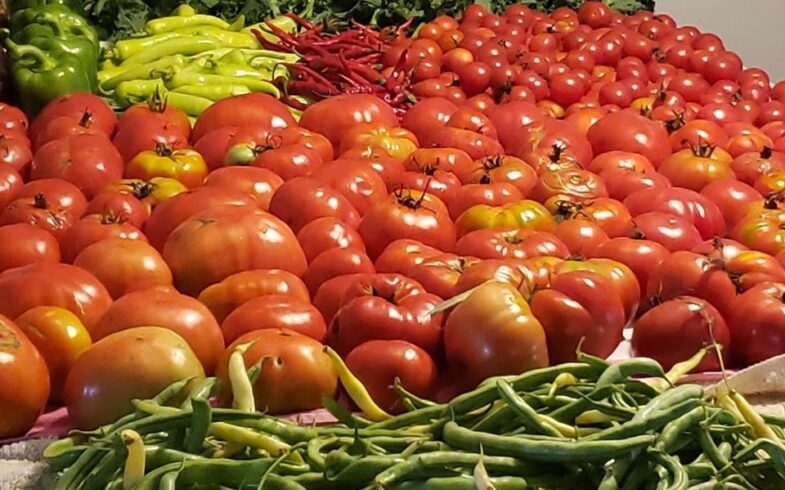
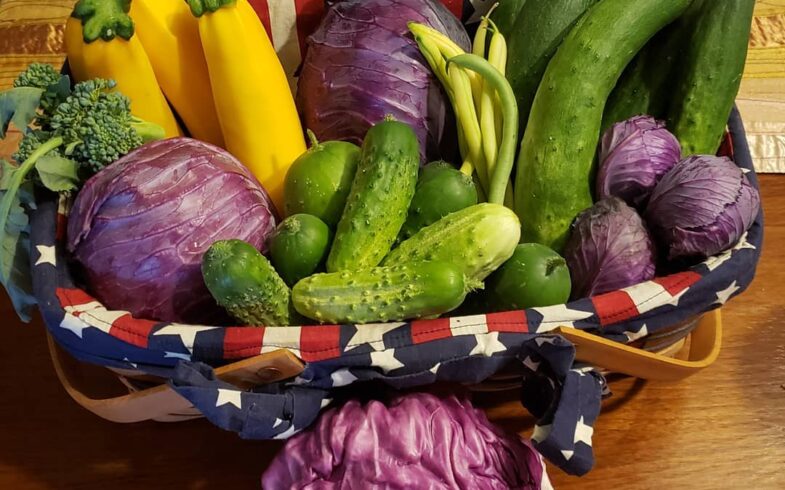
What Does Green Pig Farm Grow in Their Garden?

We often get questions about what we grow in the garden, so we thought we’d share what we have planted this year, as well as how we preserve it. This list will not only include where we originally purchased the seeds (since we now seed save), but also links to other resources we thought might be helpful. We’ll start with our favorite category: legumes.

Legumes

Legumes are our number one crop because of their versatility. This group includes things like beans, peas, peanuts, and even clover. If you want to know why this is our favorite category, check out our post: The #1 Garden Item to Plant.

Here is what we are growing this year and how we will preserve the harvest:

Nightshades

Nightshades are a group of fruits and veggies that contain solanine, including tomatoes, peppers, and potatoes.

  • Tomatoes
    • Yellow Pear (fresh eating)
    • Red Cherry (fresh eating)
    • Brandywine beefsteak (fresh eating, water bath canned, dehydrated)
    • Roma V (water bath canned)
    • San Marzano (water bath canned)
  • Peppers
    • Cayenne (water bath canned, dehydrated)
    • Jalapeno (frozen, water bath canned, pressure canned)
    • Alma Sweet Paprika (dehydrated)
    • Criola de Cocina (frozen)
    • California Wonder (frozen)
    • Habanero (dehydrated, water bath canned)
    • Tangerine Dream (fresh eating)
    • Sweet Long Blend (fresh eating)
    • Golden Marconi (frozen)
  • Potatoes
    • Yukon Gold (cold storage)
  • Eggplant
    • Black Beauty (frozen)

Brassicas

Brassicas are often referred to as cole crops (sometimes mistaken for “cold crops”). These plants can usually be planted when it is a bit colder, before the first frost. If planted for a fall harvest, they will tolerate a light frost, too. Some even say frost improves the flavor of these veggies.

Grain

  • Peaches and Cream Sweet Corn (frozen)

Curcubits

Curcubits include cucumbers, summer and winter squash and melons. Curcubits provide some of the best fresh eating and long term storage items, in our opinion.

Umbellifers

This small group of items include celery, carrots and even parsley.

Alliums

Alliums include some of the best aromatics, garlic and onions. In addition to providing lots of flavor, both of these items are easily stored for later consumption.

Herbs and Greens

  • Dwarf Jewel Mix Nasturtium
  • Purple Basil (dried)
  • Sweet Basil (dried)
  • Dill weed (dried)
  • Rosemary (dried)
  • Thyme (dried)
  • Oregano (dried)
  • Red Romaine Lettuce

Fruits and Berries

Miscellaneous

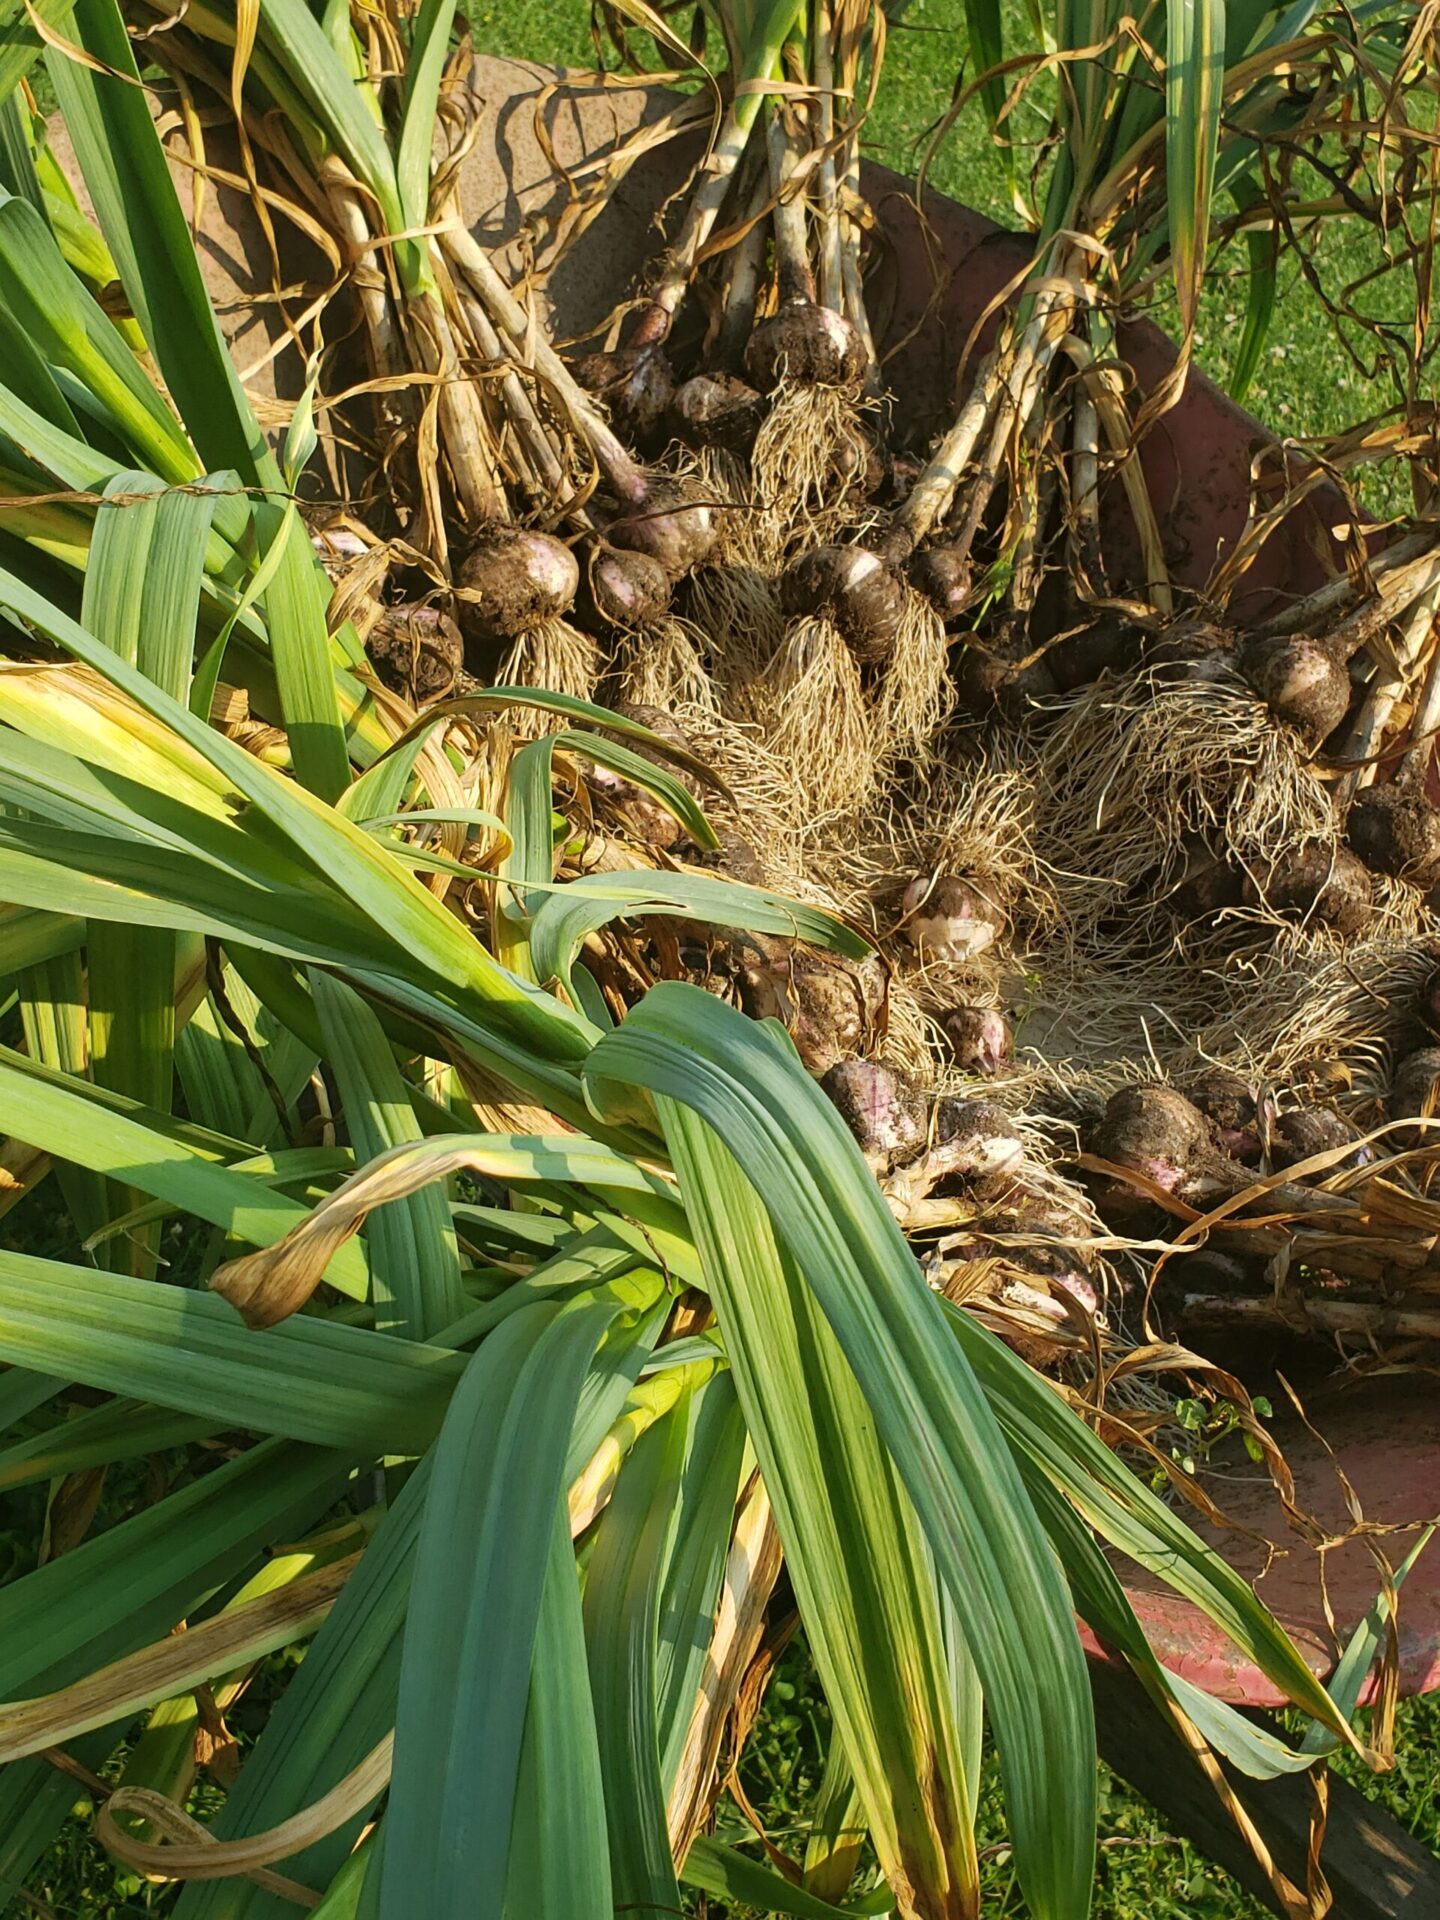
How to Cure, Prep, and Store Garlic

You’ve picked your garlic. But, now what? Let’s talk about how to cure, prep, and store garlic to get the maximum shelf life. (If you want to learn how to grow your own garlic, check out our post How to Grow Garlic in 3 Easy Steps.)

Once your bulbs of garlic have been plucked out of the ground, there are several steps to complete to get them ready for storage. First, “clean” freshly picked garlic. By this, I mean clumps of soil that remain on the bulb or roots should be brushed or shaken off. Your goal is to get most of the extra debris off of garlic.

At this point, some gardeners choose to remove the garlic tops by cutting them with shears or scissors. Others, like me, keep the tops on so the garlic can be bundled and hung to cure.

Whether growing hard- or softneck varieties, the garlic must be cured. Curing is a process that allows the garlic to dry out. If you are bundling the garlic, you can hang them, or you can lay loose garlic on a screened table. The goal is to get as much airflow around the bulbs as possible.

Hardneck garlic is bundled in packs of 10 by wrapping tops with twine.

Moisture is the first enemy of garlic, so airflow is critical to remove it. Get creative with your curing solutions. For instance, if you don’t have a wire table, think about items that you might already have that could provide aeration; cooling racks, daisy trays, or wire scraps can all create suitable drying surfaces. If hanging, string, hooks, bailing twine, or laundry line could make a temporary hanging structure. However, whether hanging or laying, make sure the selected area is dark. Light is is the second enemy of garlic –and both moisture and light create an environment for mold growth.

Allow your garlic to cure for 2-4 weeks. The time needed will vary depending on the humidity, size and type of garlic and temperature. Garlic is fully cured when the outer layers of garlic become papery and the tops are crispy and dry.

Left: Cured garlic Right: Cured garlic that has been cleaned for storage

Now it’s time to grab your scissors or shears!

Once cured, you can cut off the garlic tops, leaving about a 2 inch piece on the top of each bulb. Cut off the roots, brushing off any remaining soil that may remain.

Lastly, peel or rub off the outermost layer of paper to expose a clean layer.

At this point, your garlic is ready to be stored.

Place your prepped garlic in a breathable vessel. Wood crates, baskets, and paper bags are perfect for this because they allow for airflow. You can store your garlic at room temperature for several months without issue. To extend the shelf life, though, storing in a cool, dry place, like a basement or root cellar can preserve the harvest for even longer. We’ve been able to store garlic for over 10 months by doing the latter. Whatever you do, don’t put your garlic in the fridge! Not only will it create unwanted smells, this environment will introduce moisture to the bulbs, causing more harm than good.

We hope this answers your questions on how to cure, prep and store garlic!

How to Grow Garlic in 3 Easy Steps

Garlic. A cousin to the onion. Culinary deliciousness. Easy to grow.

Have you wanted to grow garlic, but haven’t the foggiest on how to start? Here is a step-by-step guide on how to plant it. But, before we start, let’s review the items you will need to grow garlic:

  • garlic bulbs (although some people say you could use store bought garlic, we recommend buying bulbs from a nursery center or gardener since it will be compatible with your growing area)
  • an area to plant that receives 6-8 hours of full sun (this could be a small plot in the garden or in some medium to large pots)
  • gloves (optional, but who wants dirty hands if it can be avoided?!)

OK, let’s get started with our step-by-step guide…

STEP 1-PLANT

First, determine when to plant garlic and plant it. I know this sounds vague, but depending on where you live and the type of garlic you are planting, the time frame in which to plant will vary. A general rule of thumb is to plant garlic on the day of the year with the shortest amount of daylight and harvest it on the day with the longest amount of daylight. Gardeners in my neck of the woods (Zone 6b) often use this guide: Plant on Columbus Day. Harvest on the 4th of July. Ideally, the goal is to get garlic in the ground before the ground freezes. The garlic will begin to develop roots before winter; growth will continue once the ground thaws in the spring.

The spring appearance of garlic!

Once you determine your planting date, break apart the bulbs into cloves several days before you are ready to plant. You can leave the paper on the cloves. On planting day, place cloves root side down, providing enough space for them to grow into bulbs. I usually space my cloves about 4 inches apart in rows that are about a foot apart. If you live in a colder region you may want to apply a layer of mulch; otherwise, forget about them until spring.

STEP 2-MAINTAIN

Pull a bulb to check on progress

Garlic is fairly low maintenance. As with most fruit and veggie plants, keep the area weeded. To help combat weeds and save on watering, apply a layer of mulch, like straw or grass clippings around the plants. There are methods to fertilizing garlic that can help to develop larger bulbs, but as long as you are using a rich soil and aren’t entering any garlic growing competitions, you really don’t need to fertilize.

Lastly, monitor for disease. As mentioned, garlic does not require much attention at all.

As a matter of fact, garlic is planted by some to deter pests from the garden; however, can be susceptible to thrips (small insects) and rot (a fungus) that can impact your garlic’s growth.

STEP 3: HARVEST

If you’re in an area where growing hardneck garlic is the only option, you will actually have two harvests: scapes and bulbs. Softneck variety growers, hang tight…

OK…hardneck growers, several weeks before bulb harvest, you will notice thick stalks with a tapered bulb growing out of the middle of your plants. The stalk, called a scape, will rob energy from the bulb and form a flower. It should be cut from each plant to allow the energy to go into bulb production. The bonus: scapes have a lovely mild flavor and can be added to lots of dishes where a bit of garlic flavor is wanted.

On harvest day, both softneck and hardneck growers, can carefully harvest their bulbs. In loose soil, grab at the base of the plant and pull up gently. If there is resistance, you may want to use a small shovel to loosen the soil around the bulb. Shake excess dirt off of the bulb and roots. Then, give yourself a pat on the back…you’ve successfully grown garlic. If you want to know what to do next, read our post on How to Cure, Prep and Store Garlic.

Feeling super successful? Try adding these 3 items to your garden planting list!

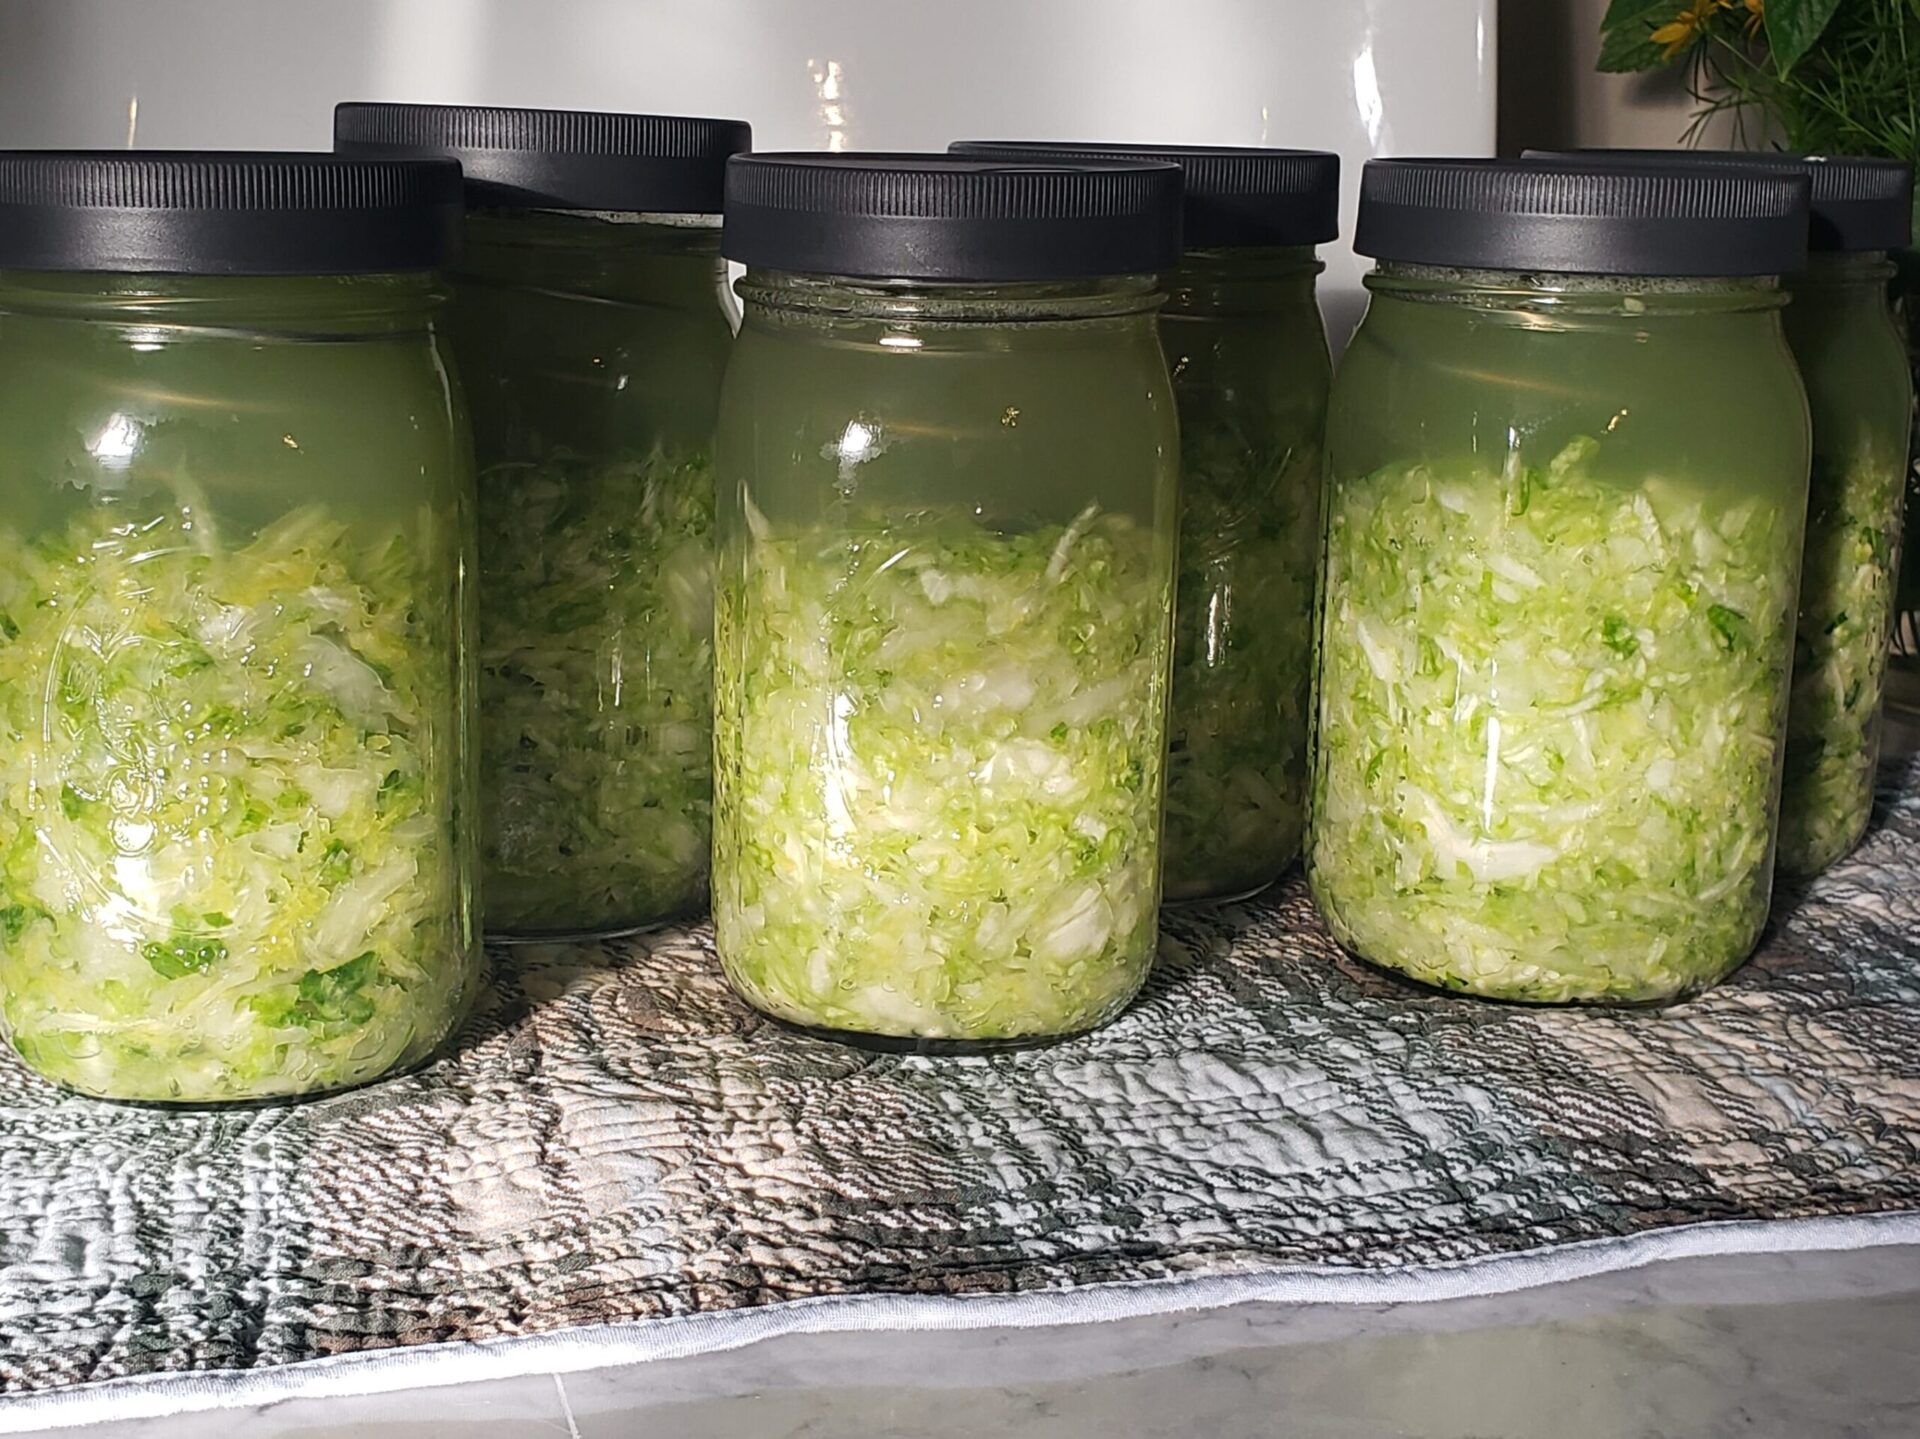
Making Sauerkraut in a Jar -The Quart Jar Method

Quart jars of freshly made sauerkraut

What is sauerkraut?

Sauerkraut is a German word that means “sour cabbage.” Although this German word appears to be the most popular name for this side dish, fermented cabbage is found in countries around the world. Perhaps it is so popular because it tastes so good. Perhaps it is because it has wonderful health benefits. In either case, let’s talk about how to make a small batch of sauerkraut.

What do I need to make a small batch of sauerkraut?

There are very few items required for sauerkraut. For a successful batch, you need:

  • cabbage –fresh is best, ideally picked and processed within 48 hours of harvesting
  • salt –canning or kosher salt is ideal
  • a quart jar –you can adjust this recipe to make multiple jars or a large crock, but we’ll explain why we prefer this size
  • a fermenting lid or cheesecloth –a cover for your jar
  • a weight that fits inside the jar — to prevent cabbage from floating to the surface

How do I make sauerkraut?

While fermenting can seem intimidating, it really is just science…and boy do we love science! You will be using the natural bacteria living on the cabbage to lacto-ferment it; this acid is what gives sauerkraut its distinctive flavor. To make each quart, you will need:

  • two pounds of shredded cabbage
  • one tablespoon of salt.

You can cut cabbage by hand, run it through a food processor, or shred it with a mandolin. However, the more consistent you shred it, the better. Smaller pieces with ferment much more quickly than larger pieces, which means they can lose their texture. Once you have shredded the cabbage, weigh out two pounds in a large vessel –bowl or food-grade bucket and add one tablespoon of salt. Begin massaging the salt into the cabbage; the salt will pull the water out of the leaves. You want to continue this process for several minutes until you have created about a cup or so of brine. Add your cabbage to the quart jar, carefully packing it into the bottom. The two pounds will fit –promise! Then top off the jar with the brine.

Once your ‘kraut is made, you want to make sure it doesn’t float. Since you are using a jar, you will need a smaller weight to keep the cabbage towards the bottom of the jar. You could use a baggie filled with extra brine or even a smaller jar for this purpose. We opted to invest in a Ball brand fermenting kit that included a spring which keeps the cabbage submerged. Any of these options will work just fine –a weight is a weight. We also like to cut a small circle out of one of the outer cabbage leaves to act as an additional “seal”; we place the leaf on top of the shredded cabbage (and below the brine) to help keep the cabbage in place prior to placing our weight.

Once the cabbage is weighted down, close your jar using a fermenting lid or cheesecloth. You don’t want to use a regular canning lid because this process creates gas and the gas needs to be able to escape

What do I do once the sauerkraut is made?

You don’t have to do much. Check on your jars every day or two. If you see bubbles at the surface of your brine, it is an excellent sign that fermentation is happening. If you see any floating pieces of cabbage, they should be removed. Pieces of cabbage not submerged can mold and ruin an entire batch of sauerkraut…we definitely don’t want that! You can also carefully skim off any scum that may have formed on the surface, too.

Allow your sauerkraut to ferment at room temperature for at least three days; however we recommend fermenting for at least two weeks for the best flavor. Once completed, you can replace the cheesecloth or fermentation lid with a regular jar lid and pop them into the fridge so you can enjoy the sour goodness for weeks to come. You can also water bath can sauerkraut if fridge space is limited; however, it will kill the beneficial bacteria residing in the ferment. Check out our printable canning inventory to help you organize your jars!

Why do we prefer the quart jar method?

We prefer the quart jar method for several reasons:

  • smaller batches minimize potential loss
  • it allows you to process smaller batches as your cabbage is ready
  • once fermentation is complete, you don’t have to transfer the sauerkraut to another container.

So, here’s the real deal. We’ve been making sauerkraut for several years. Last year our goal was to make the largest batch to date. Sadly, the large batch went bad and we lost it all. All 20 pounds of it. When using quart jars, if one happens to go south, you’re only losing one jar…not an entire batch. This was the driving factor to change our method. But, as noted, there are also other benefits. Fermenting in quart jars is ideal if you are only growing two or three cabbages earmarked for sauerkraut. It is also perfect for a staggered harvest.

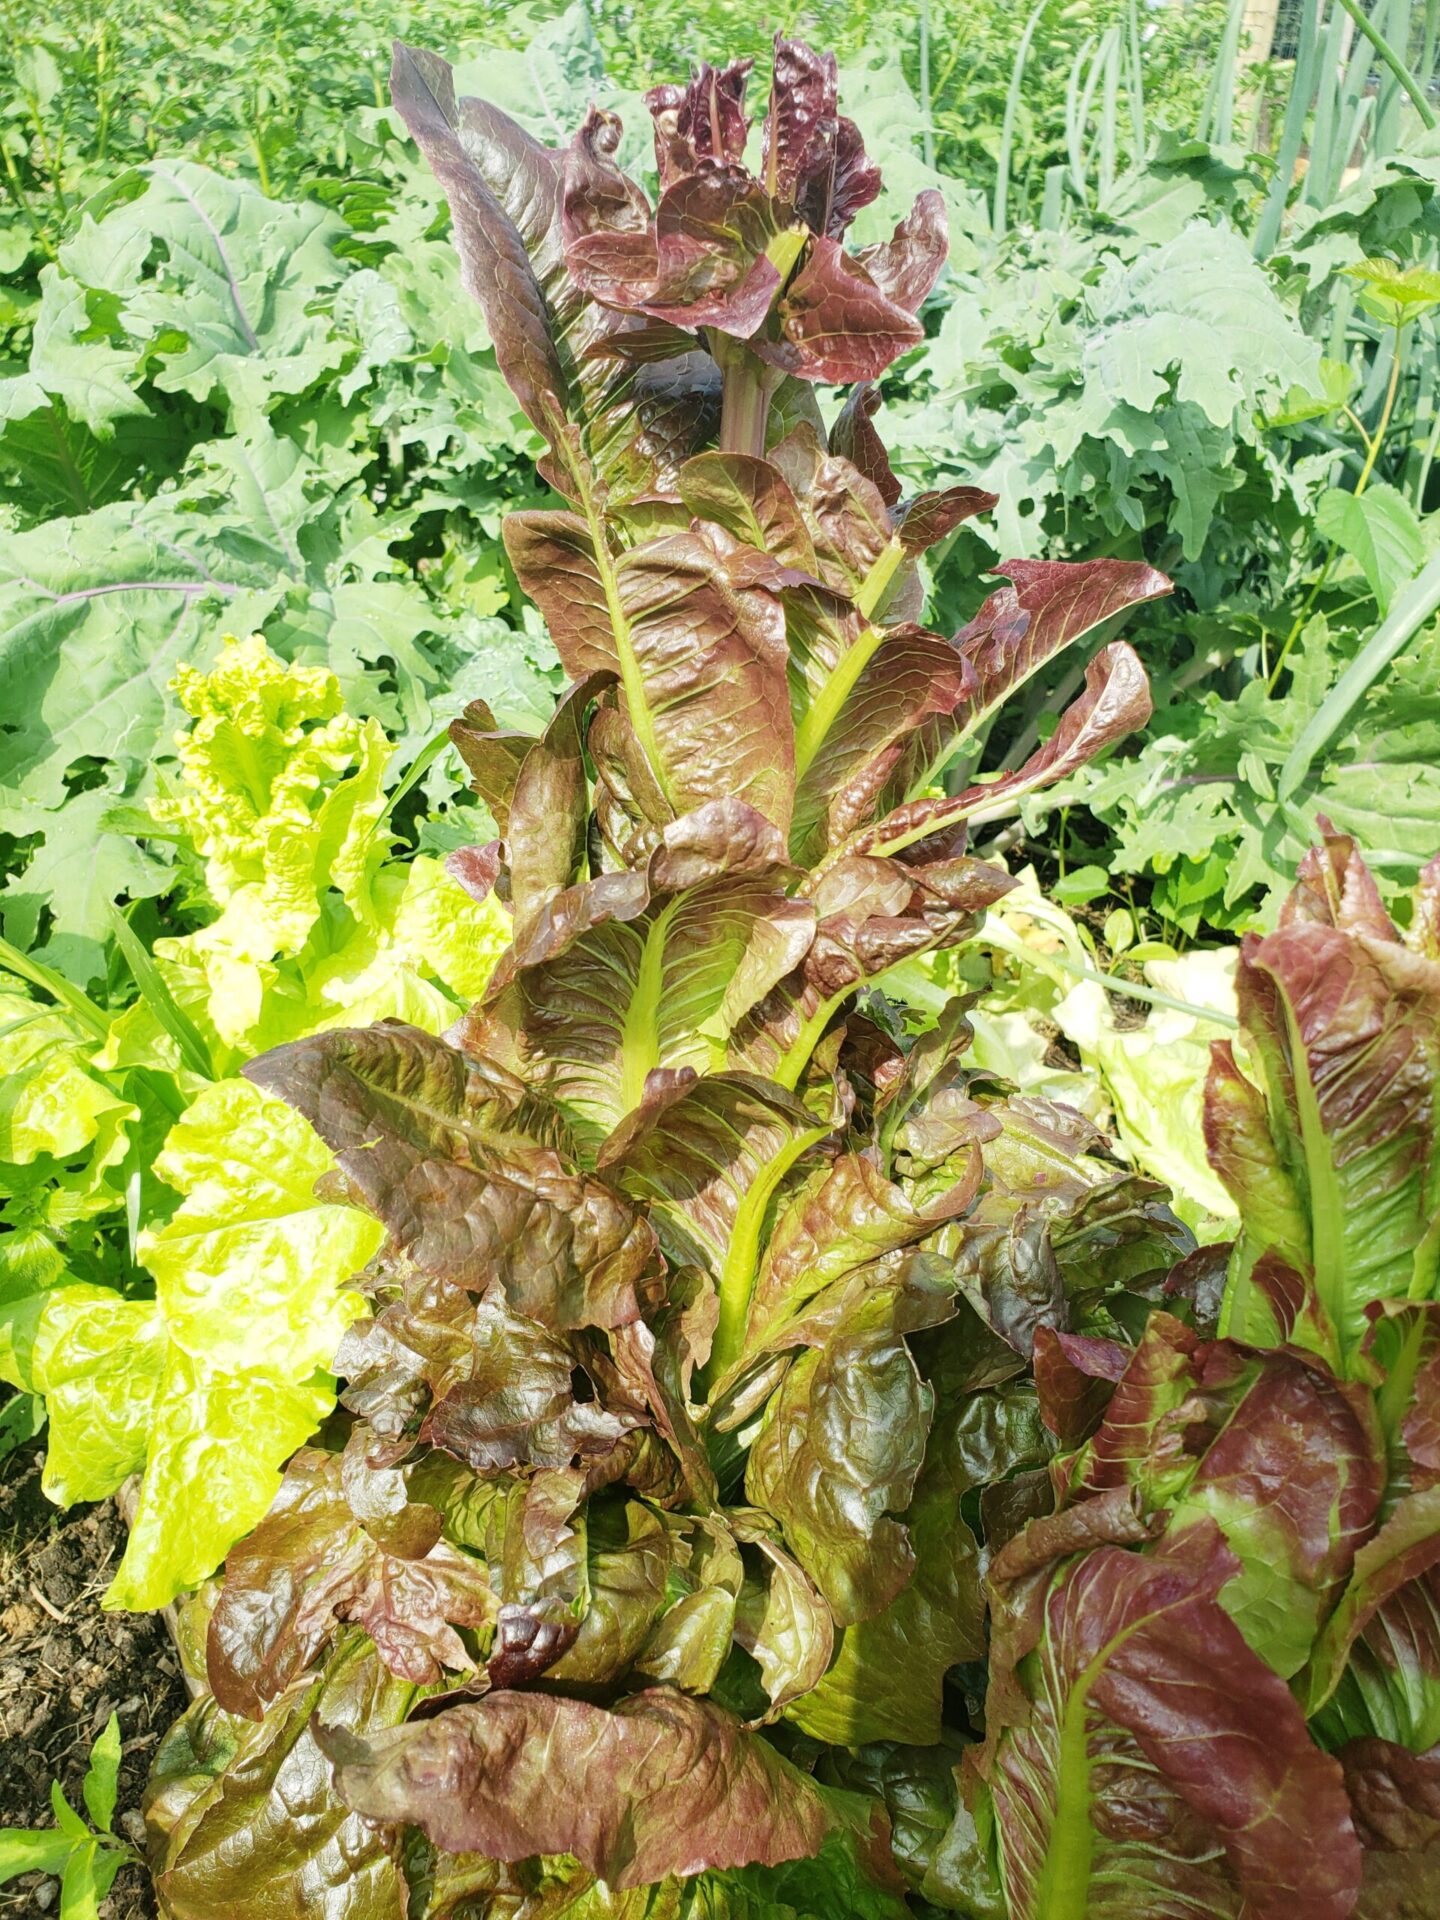
Did My Lettuce Bolt? The What and Why of Bolting

Red romaine lettuce bolting in the heat of summer.

You’ve been enjoying lettuce for weeks when all of a sudden you walk out to your garden and see this tall tree-like plant where your greens had been happily growing. You tear off a leaf of your favorite salad base only to get a mouthful of bitterness.

If you see this happening in your garden, your lettuce has bolted. Bolting is a natural process in the reproductive cycle of plants where the plant flowers and goes to seed so that it is able to plant more of itself. If you think about it, it’s pretty cool. In the moment, though, bitter lettuce is not cool. During this process, usually triggered by:

  • warmer daytime and nighttime temperatures
  • lack of water
  • other plant stressors

many of the properties of the original item are lost –for lettuce, the leaves become a bit tougher and bitter. Unfortunately, there is no reversing the process once it starts. You do have a couple of options, though. If you raise livestock –chickens, pigs, goats, and more– giving them this gourmet treat is free food for them. We feed some of our bolted items like broccoli, radishes and lettuce to our backyard hens and they certainly do not mind the bitterness. You can also allow the plant to complete it’s life cycle…it will continue to bolt, flower, and form seeds. Once completed, you can collect seeds for replanting in the fall or spring. Or, you can simply add the spent plants to your compost pile.

Whatever the case may be, know that bolting is one of the things that all gardeners encounter. If needed you can adjust your planting schedule or location so hot days and nights can be avoided. You can also make sure you’re watering frequently, and most importantly, don’t stress!

If you are pulling your lettuce due to bolting, replace it with our number one garden veggie. Find out what it is here

The #1 Garden Item to Plant

Haricot (navy) beans growing vertically on cattle panel.

BEANS

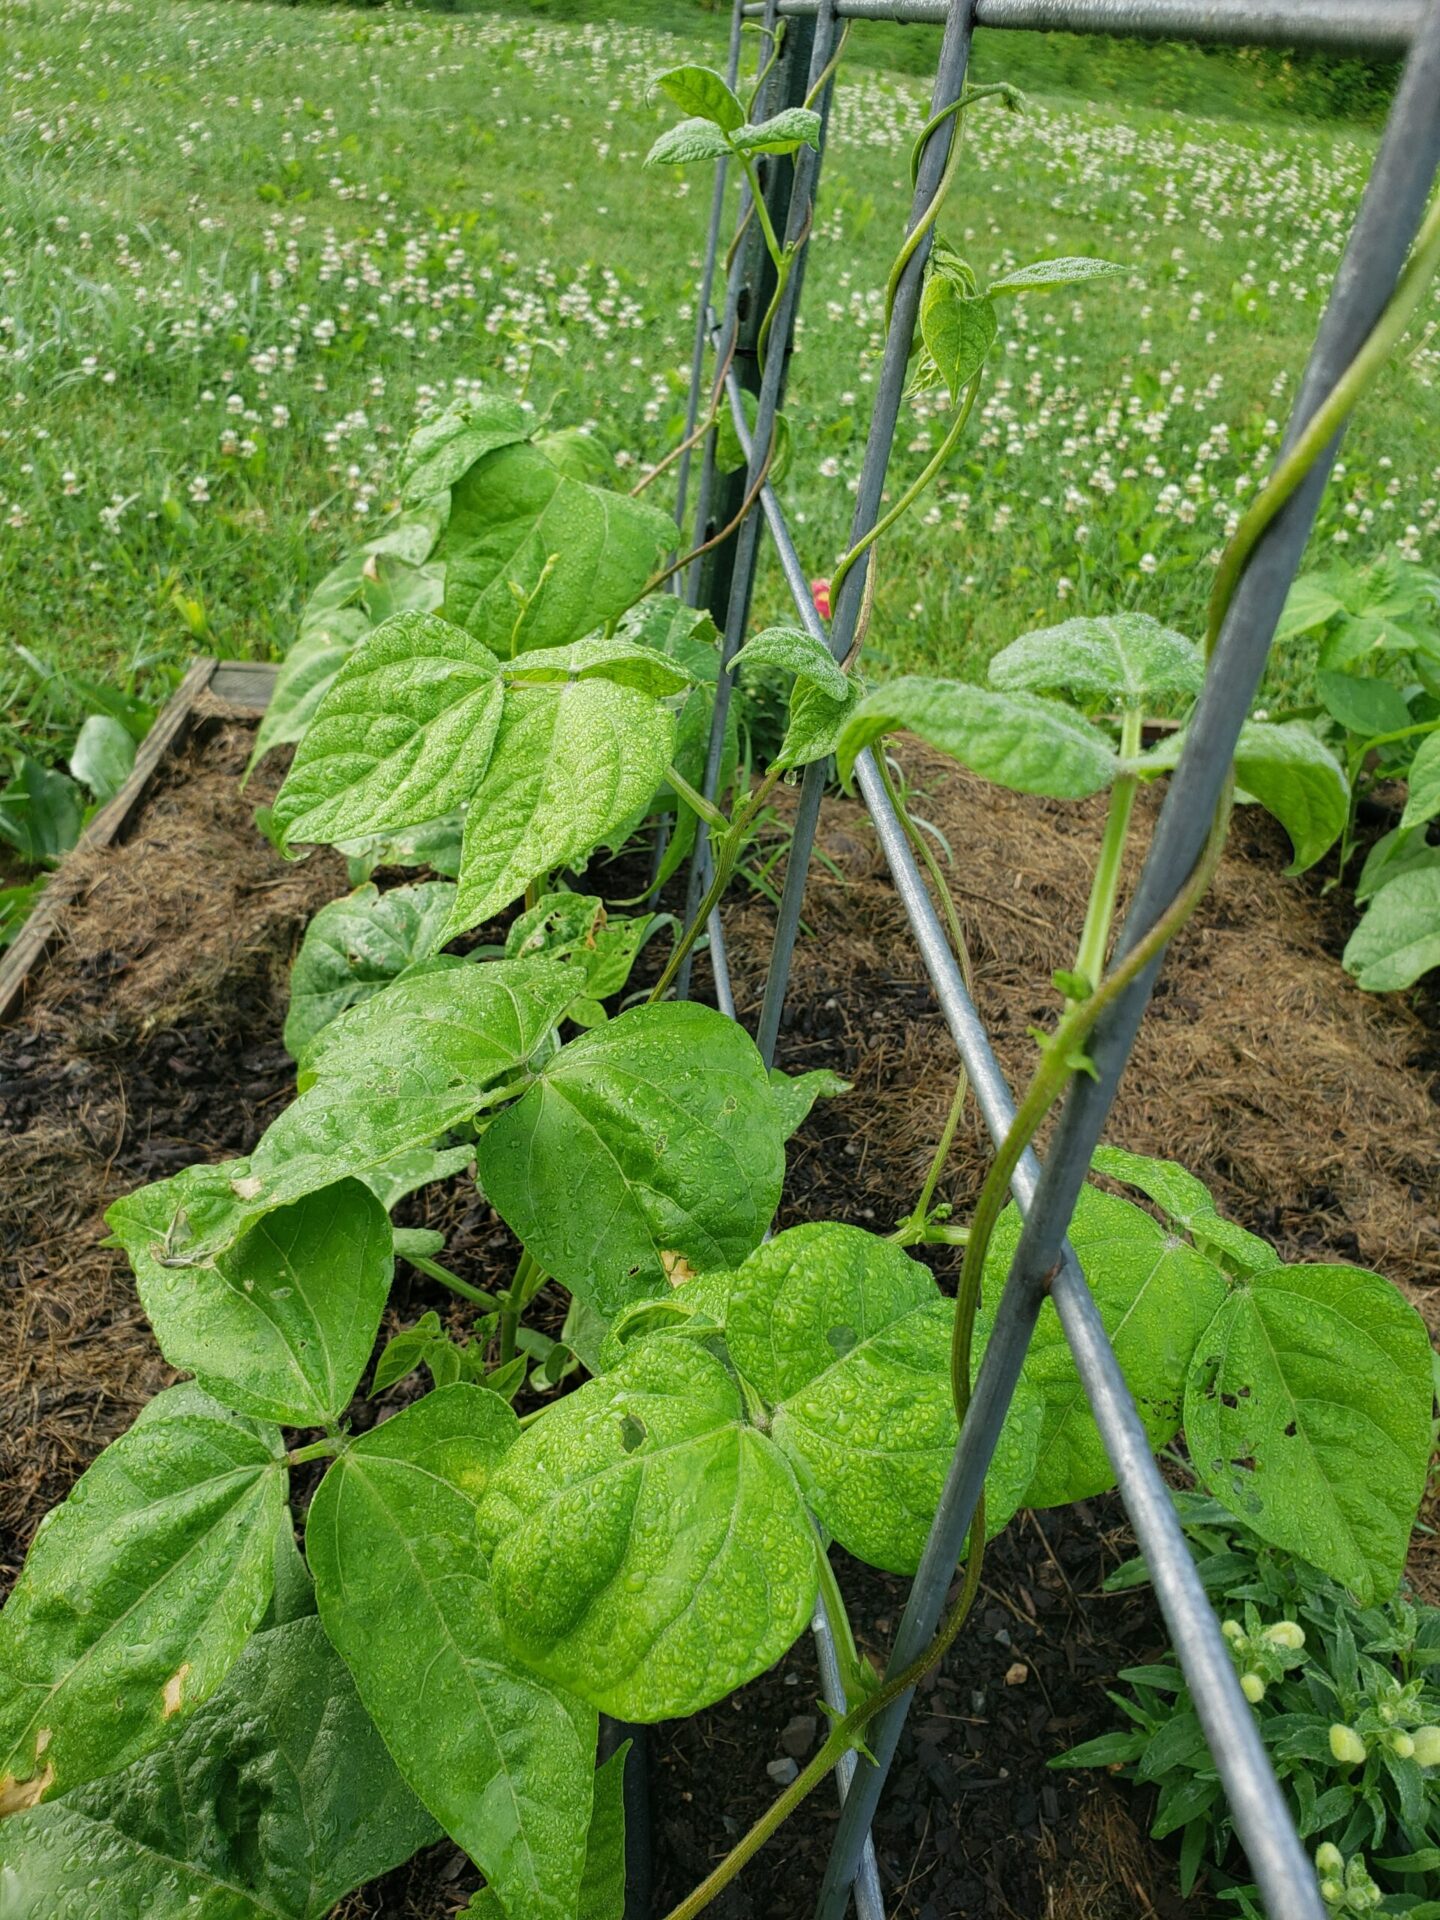
BEANS

If we had to vote on only one item to grow in the garden, it would be beans. Why?

  • First, beans are loaded with plant-based protein
  • Second, beans can be dried, canned or frozen
  • Third, they can be grown all summer long

Futhermore, beans are also nitrogen fixing plants, which means they can begin to amend your soil. So, do you want to know the basics? Read on…

PLANTING REQUIREMENTS

In our opinion, beans are perfect for the beginner and the advanced gardener. Grab a pack of seeds, plant them in the ground after the danger of frost has passed and give them some water. From there, beans are relatively maintenance free. But, you do need to select the appropriate type of bean…

BUSH VS. POLE BEANS

Bush beans will not need any type of support, unlike their counterpart, the pole bean which needs a trellis or a fence in which to climb. Be sure to read the back of the seed envelope as it will tell you whether your beans will need support. There are hundreds of varieties to choose from. You have the basics: yellow and green. Then the not-so basic haricot, purple, and turtle beans. We have even grown skunk beans! (I bet you can imagine what those beans look like! )Not to worry, though: you have lots of green and yellow bean options. You can find beans at your local nursery (support local business!), a big box store, and even your local dollar store.

HARVESTING

Once pods are developed, beans can be picked, washed and eaten. You will usually start picking 2-3 months after the beans were planted. If you want beans for fresh eating or for preserving, pick the pods when they are slender –larger, bumpy pods usually mean the seeds inside have developed and will make for a less palatable experience. If you are growing a bean for dry storage (or you would like to save seeds for later use) allow the pods to fully develop. These pods can remain on the plant and begin the drying process right in the garden.

PRESERVATION METHODS

Fortunately, beans have several storage methods. If used within a week or two, beans can be stored in the refrigerator. For longer term storage, beans can be frozen in freezer bags or using a vacuum sealer; however, beans must be blanched to preserve color and nutrients. Lastly, beans can also be pickled and preserved using water bath canning, or can be pressure canned for later use.

DIY Inexpensive Vertical Trellis

[sg_popup id=116]

So, you’ve spent nearly every dollar you have on your favorite seeds, a few bags of compost, and cages for your tomato plants. It’s nothing new this year, but you quickly realize you have bought too much stuff for your designated garden space. And, who can blame you?! Fresh pico, homemade pickles, and zucchini chips  –made from things that you’ve grown.

So, how can you maximize your garden space to fit more of the produce you’d like to grow? Vertical space. I mean, grow up! Not only can you maximize your planting space, but the plants (and you!) also benefit.

Perhaps, you’ve avoided vertical gardening because of the expense. I’m sure you’ve walked into the garden section of your local home improvement store in search of a trellis, only to realize you need to take out a small mortgage to pay for the required supplies. A simple 3 foot by 6 foot garden trellis can cost upwards of $40….sometimes even more. And, this size might accommodate two cucumber plants. 

How would you like to be able to cut that amount in half and triple or quadruple the number of plants you can fit onto the trellis? Would you like it sturdy enough for twenty pound watermelons as well as hundreds of cucumbers? 

If so, read on.

You don’t have to get fancy with your purchasing –with that same $20 you can install a sturdy trellis that can accommodate 4-6 plants, including melons!

Instead of heading to a big box store for your supplies, drive to your local farm store (we have a Tractor Supply just a few miles away). What you are in search of is a cattle panel or a feedlot panel. It doesn’t matter if it is for cattle, pigs, or goats; the only difference in the panels is the size of the opening, and since you’re not containing animals, you are free to pick the one you prefer, the one that is the cheapest, or the one that is the most aesthetically pleasing to you. These soon-to-be trellises are rather large, about 4 feet by 16 feet, but that is what you want.

If you don’t have a truck or trailer, you’re going to need one to get this piece of steel home. We have a pick up truck with a six foot bed and with some ingenuity and a few ratchet straps, we were able to safely transport two panels home. Might I suggest bartering with a friend or neighbor some of your fresh produce for the use of a truck. Bartering is magical!

Before you head to the cash register, ask yourself if you have any metal pipes, old shovel handles, or garden stakes laying around –you’ll need two pieces of a straight sturdy material to secure your DIY trellis. If you don’t have anything that you might be able to use (we used old garden stakes), add two garden stakes or pieces of rebar to your cart.

Once your home, you’ll have a trellis with more than 64 square feet of growing space installed in less than 10 minutes. Inventory what you need so you only have to make one trip into the garden. You’ll need the following:

Materials

1 cattle or feedlot panel

2 pieces of rebar, steel rod, wooden fence/garden stakes

Hammer

gloves

Find a spot in your garden that is approximately 4 feet by 8 feet. This will be the area that you will be creating the arch. It sounds like a lot of space, but because you are going vertical, you will be able to use this space not only for your climbing plants, but also for other garden veggies. 

In order to install the trellis, you’ll be applying some force onto the panel, so an extra set of hands would help. First, bend the cattle panel to the desired arch. The first inclination of this arch is to push outward, so to prevent that from happening, secure each side with rebar, stake, etc. by inserting it through one of the bottom openings and hammering it into the ground. The stake doesn’t have to be perfectly straight, but you want to make sure you have it hammered into the ground at least a foot in anticipation of the weight it will be accommodating. Repeat this process on the other side of the cattle panel. Depending on your configuration, you should have an arch that is 5 to 6 feet tall. 

You can then plant your climbing plants: cucumbers, watermelon, honeydew, pole beans, etc. I recommend 2-3 plants per side, depending on what you are growing.  I overbuy, too, so most of the time I am putting 3 plants per side, for a total of 6 plants. Do what you feel comfortable with. (If you are planting smaller items like beans, you will be able to accommodate more)

Once planted, don’t forget to mulch around your items. Who wants to weed? I don’t! Our preferred mulch is grass clippings for two reasons: 1. It is free and 2. It adds nitrogen back into the soil. If you plan on using grass clippings, just make sure it hasn’t been treated with any pesticides. The added bonus to mulching (besides minimizing weeding), is it conserves water by slowing down evaporation. That means less watering, too!

Pro tip: Allow 6-10 inches of un-mulched space around each plant!

Here is our finished work –you can see we have two cattle panels side by side, and have mulched around the base of the trellis, avoiding direct contact with the plants.

We also were able to plant some bush beans on either side of the trellis to maximize our space. You can see that as the mulch ages, it turns brown –a sign of early decomposition –just what you want to add nitrogen back into your garden.

Once installed and mulched, your trellis area needs very little tending to. If you like your plants to stay somewhat organized, train them on the trellis, placing tendrils in the area where you want them to attach. If you have found vines attaching to an area where you don’t want them to be, don’t be afraid to move them by either unwinding the tendril or plucking it off and relocating it. 

This picture was taken well into the growing season where we live (July 20, Zone 6A) and you can see that most of the vines have grown up and over the trellis. Just above my head is a sangria watermelon and to my left and right are some large slicing cucumbers just hanging out!

Bush beans have filled in the space on either side of the trellis. We prefer large walking spaces in our garden to maneuver wheelbarrows and mowers, but you could also fill in with lettuce or other shade-loving produce.

Three Easiest and most Versatile Plants for Beginner Gardeners

It’s the Spring of 2020, and we’re experiencing a whole new way of living –at a mask-donning-distance of at least six feet. School and university buildings are closed, and the teaching professionals are now educating our students through virtual learning.  Family gatherings and celebrations, like birthday parties or even weddings, have come to a screeching halt, only perhaps to be substituted by a video call. And, even the simplest task of weekly grocery shopping has been drastically altered, with many consumers opting to use online services to limit interactions with others.

I’m one of those grocery shoppers, selecting fruits and veggies with the click of a computer button. I don’t get to peruse the produce section for the sweetest smelling cantaloupe or the firmest cabbage head. As a matter of fact, almost 50% of my fruit and veggie items ordered over the past month have been canceled due to lack of inventory. No strawberries. No brussel sprouts. Not even a head of cabbage. For this reason, I am inspecting my garden more than once a day to make sure my loved produce isn’t being shared with unwanted critters, showing signs of stress, or worse: dead. Soon enough we’ll be picking pounds of asparagus, peas, berries and more. For now, though, I’m relying on the frozen and canned items we saved, and the salvaged items I can get from my virtual grocery shopping experience.

You might be experiencing the grocery struggle, too. And, for this reason, you might be thinking about planting a garden more than you ever have before. In my opinion, the key is to start small and become knowledgeable on the basics of gardening. Being overwhelmed right now would be no good, either. So, here are the “Three Easiest and Most Versatile Plants for Beginner Gardeners.” These fruits and veggies will provide the most varied uses in the kitchen, while allowing multiple means of preserving for later use.

  1. Greens (start from seed)

Think spinach, kale, or even swiss chard –and select one of these leafy greens to plant. (If you want to go all out, then you can, but remember, the goal here is to keep it simple!) These greens are some of the first items you can add to the garden, which means they are the first to be harvested, too. The simple root system, small stature, and the fact that you can easily start them from seed, means you could use a pot, an old plastic tote, or even a soil bag as a planting vessel. You could also plant spinach, kale and swiss chard in garden beds if you have them prepped. The greens mentioned are cold tolerant and in little more than a month, will be ready for harvesting, and continue to provide leaves loaded with nutrient-dense calories until the hot summer temps set in. These leaves can be used raw for salads, but better yet can be cooked in soups, pastas, and more, adding color and health benefits to every bite. Have I sold you yet? If not, might I add that you could also freeze or dehydrate any of the aforementioned to use later? While you could plant nearly any variety of lettuce, the versatility (and some of the nutrients) is subpar when compared to spinach, kale, and chard. 

  1. Bush Beans (start from seed)

The key here is to select a bush variety –this means that the plants will not need any type of support, unlike their counterpart, the pole bean which needs a trellis or a fence in which to climb. Not to worry, though: you have lots of green and yellow bean options. (If you want to get fancy, I’ve even seen purple bush beans!) Just make sure the package says “bush” on it and you’ll be good to go. As far as planting, once the danger of frost is gone, you can plant bean seeds in nearly any outdoor location. You’ll likely need a bit more space to grow multiple plants to pick a decent harvest, so I would recommend a larger raised bed or ideally in-ground planting. Most beans can be eaten raw, or cooked and added to any number of dishes. Plus, just like the greens noted above, beans can be frozen for use later. If you want to get crazy, beans are the perfect beginner item for drying, pressure canning or even seed saving. Some added bonuses are that beans are nitrogen fixing, which means they add nitrogen back into your soil and have very few pests.

  1. Tomatoes (start with plants)

Tomatoes are probably the most versatile of the garden items listed here, as they serve many hot and cold culinary purposes. For this reason, pick a variety you enjoy. If you’re unsure of what type to pick, I would suggest a roma tomato since they are a favorite for not only eating raw, but for sauce-making as well. Regardless of your final selection: beefsteak, roma, cherry, or other, wait to plant until after the danger of frost has passed since these tender plants cannot tolerate colder temperatures.  If you’re sticking to container gardening, select a determinate tomato since it has a preset genetic height and will not outgrow it’s container. If you’re planting in the ground, you have more options –determinant or indeterminant and be successful with either one. (Typically, your plant tags will give you this information –if not, Google will know!). Once planted, tomatoes require the most TLC in the garden (for pest control, disease management) and need the most time to produce. Once established, these fruits cannot only be used right away, but can be dehydrated or even water bath canned for later use.

If you’re willing to invest a few dollars on seeds and plants, these three items would be the ones I would suggest for a beginner. If you need additional direction on tools, check out my blog “The 7 Essential Items You Need to Start Gardening” for even more tips and suggestions. Happy planting!

The 7 Essential Items You Need to Start Gardening

Are you struggling to find fresh fruits and veggies for your family?

Do you see your friends posting pictures of their beautiful produce and have “produce envy?” 

Are you sick and tired of paying outrageous prices for organic food at the supermarket?

Do you want to know where the food you are eating came from?

Are you looking for a new hobby that isn’t too expensive?

Do you want to spend more time outdoors?

If you answered yes to one, some, or all of these questions, you might want to think about planting a garden. I promise that taking this step doesn’t have to be expensive (or scary). In addition to having a bit of space, whether it be in your yard or in pots on your patio, only a few basic items are needed.To get started, here are the 7 items you should have on hand.


1. Gardening Gloves.  On the top of my list for gardening is an inexpensive pair of gardening gloves. You can go with a name brand if you’d like, but you’ll save a few bucks going with a store brand. Find a glove that has a rubber coating on the palm-side of the glove and a flexible knit material on the back. The rubber will give you some grip when pulling weeds or holding any number of garden tools. The knit backing will allow the gloves to breathe a bit and give you the range of motion you are really going to need to get down and dirty. You also won’t be cleaning grime from underneath your nails and will likely save a manicure! If you can afford it, I’d recommend buying two, or even three sets of gloves. If you’re anything like me, you’ll end up having gloves in several spots. Plus, if you tear a glove or need to launder your gloves, you’ll always have a back up pair (or two!) 

2. Garden Trowel.  When the gloves won’t cut it to pull a weed or dig a hole, you’re going to want a garden trowel. Try to find one with a metal blade, as it will last you much longer. These miniature shovels complete many tasks: digging out stubborn roots, preparing holes for plants, and even tracing lines for seed placement.  You’ll find that trowels come with metal, wooden or plastic handles. I prefer plastic handles because if I forget to round up my equipment and it gets wet, it won’t warp like a wood handle can. And, I find that metal handles heat up quickly when not in use. If you can swing it, buy yourself a back up –by having two you’ll always be able to find the second one when the first one is misplaced. It’s also great to have a second trowel because it’s a great tool for little (or big helpers) to use when in the garden. Teaching children or grandchildren…or even husbands…to help in the garden can be extremely rewarding.

3. A Hose (or a Watering Can).  Use a hose that is long enough to reach from your spigot to your garden. During the hottest days in the summer, you will be watering your garden daily, and it is no fun trekking from said water source location to the garden (I speak from experience). More often than not, you are watering because it is hot outside, so you, too, will be hot. A hose allows you to work smarter, not harder, and still hopefully enjoy gardening at the end of the season. However, if you have a small enough garden, or a trip to the spigot isn’t too far, a watering can or two will get the job done; it just might take a little longer.

4. Neem Oil.  Oddly enough, I’m putting Neem Oil on my list of Essential Items needed for gardening. It is an organic and versatile insecticide (kills insects), fungicide (kills fungi) and bactericide (kills bacteria). Why does it make this list? I guarantee you that once you start a garden, you will have unwelcome guests like cabbage worms, powdery mildew, and blight. I am no expert on bug identification or fungal diseases, but I’m learning. There is nothing worse than putting in hundreds of hours into a garden, only to have it destroyed in a matter of days by an unknown bug or disease. I prefer to buy the concentrated version of Neem oil to mix up my own batches, but you can also buy it premixed in spray bottles. 

5. Pruning Shears. I admit, I have used scissors when in a pinch, but pruning shears work much better to trim bushes, harvest produce and cut items in the garden. Pruning shears are typically spring loaded, which helps you to be more efficient in the garden. They also allow you to reach into places (like that jungle of a tomato plant) to nip suckers off your plant. You’d be surprised what you’ll be using them for: cutting flowers for vases, trimming the unsightly raspberry bushes, and plucking cucumbers off their vines. Just make sure to sanitize them between tasks/plants so that you are not potentially spreading diseases from plant to plant.

6. A Garden Rake. Let me say, a garden rake is not a yard rake. Yard rakes have flexible plastic tines, while garden rakes have short, metal tines. The sturdy metal tines allow you to move soil, or compost, remove rock and contour your garden. This isn’t necessary for container gardening, but if you’re working in the ground, it will save you loads of time.

7. A Spade Shovel. A spade shovel is a bigger version of a trowel. This larger shovel with a pointed tip will allow you to use leverage and your body weight to pierce the ground. A spade shovel is great for digging large holes for more established plants, bushes, and trees, removing sod to start or expand garden beds, and moving mulch around your plants. The tip is more effective at breaking up grass roots and slicing through the ground in general. Did I mention that you can also use your shovel and a lever to remove pesky rocks that you may have found buried in your planting area?